There are many tutorials with directions for how to use your Nvidia graphics card for GPU-accelerated Theano and Keras for Linux, but there is only limited information out there for you if you want to set everything up with Windows and the current CUDA toolkit. This is a shame however because there are a large number of computers out there with very nice video cards that are only running windows, and it is not always practical to use a Virtual Machine, or Dual-Boot. So for today’s post we will go over how to get everything running in Windows 10 by saving you all the trial and error I went through. (All of these steps should also work in earlier versions of Windows).
Dependencies
Before getting started, make sure you have the following:
- NVIDIA card that supports CUDA (link)
- Python 2.7 (Anaconda preferably)
- Compilers for C/C++
- CUDA 7.5
- GCC for code generated by Theano
Setup
Visual Studio 2013 Community Edition Update 4
First, go and download the installer for Visual Studio 2013 Community Edition Update 4. You can not use the 2015 version because it is still not supported by CUDA. When installing, there is no need to install any of the optional packages. When you are done add the compiler, C:\Program Files (x86)\Microsoft Visual Studio 12.0\VC\bin, to your windows path.
To add something to your windows path go to System, and then Advanced system settings.
System → Advanced system settings → Environment Variables → Path.
CUDA
Next, go the NVIDIA’s website and download the CUDA 7.5 toolkit. Select the right version for you computer. When you are installing it, make sure to pick custom install if you don’t want your video card drivers to be overwritten with the version that comes with the toolkit, which are often out of date. If it turns out that your version of the drivers are older than what comes with the toolkit,then there is no harm in updating your drivers, otherwise only pick the three boxes starting with CUDA.
GCC
The last thing we need to do GCC compiler, I recommend TDM-gcc. Install the 64 bit version, and then add the compiler to your windows path, the install has an option to do that for you automatically if you wish.
To make sure that everything is working at this point, run the the following command on the command line (cmd.exe) . If if finds the path for everything you are good to go.
where gcc where cl where nvcc where cudafe where cudafe++
Theano and Keras
At this point it is easy to install Theano and Keras, just you pip (or conda and pip)!
conda install mingw libpython
pip install theano
pip install keras
After installing the python libraries you need to tell Theano to use the GPU instead of the CPU. A lot of older posts would have you set this in the system environment, but it is possible to make a config file in your home directory named “.theanorc.txt” instead. This also makes it easy to switch out config files. Inside the file put the following:
[global]
device = gpu
floatX = float32

[nvcc]
compiler_bindir=C:\Program Files (x86)\Microsoft Visual Studio 12.0\VC\bin
Lastly, set up the Keras config file ~/.keras/keras.json. If you haven’t started Keras yet, the folder and file won’t be there but you can create it. Inside the config put the following.
{
 "image_dim_ordering": "tf",
 "epsilon": 1e-07,
 "floatx": "float32",
 "backend": "theano"
}
Testing Theano with GPU
Using the following python code, check if your installation of Theano is using your GPU.
from theano import function, config, shared, sandbox
import theano.tensor as T
import numpy
import time

vlen = 10 * 30 * 768 # 10 x #cores x # threads per core
iters = 1000

rng = numpy.random.RandomState(22)
x = shared(numpy.asarray(rng.rand(vlen), config.floatX))
f = function([], T.exp(x))
print(f.maker.fgraph.toposort())
t0 = time.time()
for i in range(iters):
    r = f()
    t1 = time.time()
    print("Looping %d times took %f seconds" % (iters, t1 - t0))
    print("Result is %s" % (r,))
    if numpy.any([isinstance(x.op, T.Elemwise) for x in f.maker.fgraph.toposort()]):
        print('Used the cpu')
    else:
        print('Used the gpu')
Testing Keras with GPU
This code will make sure that everything is working and train a model on some random data. The first time might take a little longer because it the software needs to do some compiling.
from keras.models import Sequential
from keras.layers import Dense, Activation

# for a single-input model with 2 classes (binary):

model = Sequential()
model.add(Dense(1, input_dim=784, activation='sigmoid'))
model.compile(optimizer='rmsprop',
loss='binary_crossentropy',
metrics=['accuracy'])

# generate dummy data
import numpy as np
data = np.random.random((1000, 784))
labels = np.random.randint(2, size=(1000, 1))

# train the model, iterating on the data in batches
# of 32 samples
model.fit(data, labels, nb_epoch=10, batch_size=32)
If everything works you will see something like this!
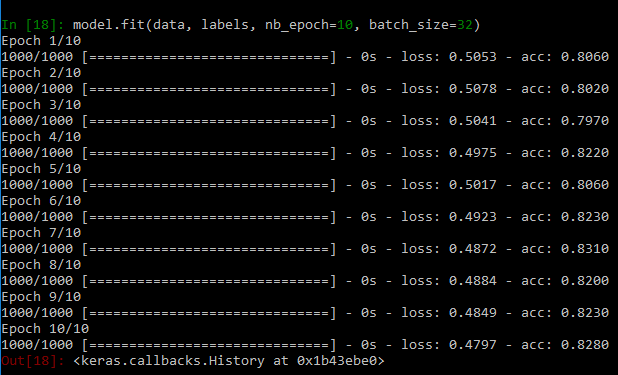
Now you can start playing with neural networks using your GPU!
 Damien is a highly experienced researcher with a background in clinical and applied research. Like JSL, he got his PhD at UCLA. He has many years of experience working with imaging, and has a particularly strong background in image segmentation, registration, detection, data analysis, and more recently machine learning. He now works as a data-scientist at Square in San Francisco.